RESTORATION
of AC's post-war 2 Litre SaloonPage 3
Stripping/Dismantling


The rear wings are fixed to the wood frame with large woodscrews. These might pull out if the wood is very rotten. Or else you might have to force the aluminium washers off so that you can grip the screw-heads with pliers. If you're lucky, they might come out with a screwdriver! The steel inner rear wings are nailed to the wood frame. UNC machine screws pass through the inner wings and boot side panels, to support the boot floor. Bolts pass through into the chassis side rails. The chances are that the inner wings have rusted away sufficiently to make removal very easy!
Interior trim has to be stripped out. Remove the seats and the varnished wooden trim and cappings. The roof edge trim can then have its cloth raised to reveal the card underneath which can be prised off the panel-pins holding them. Then the headcloths can be carefully removed starting at the front, and removing the tacks - lots of them! The leather covered door trim panels have long nails holding them to the bottom of the doors. The main floor carpets can be lifted to reveal hidden tacks along the edges nearest the doors. Other carpets are either tacked to the wood frame, or else 'glued' with bitumen. The floor panels are fixed with a mixture of woodscrews and 10-24 UNC screws.
Remember to take plenty of photos at every stage so that you know where everything goes.
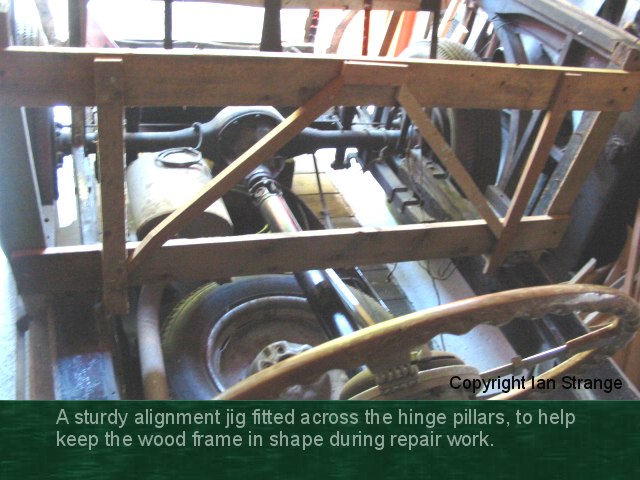
My AC's wood frame was largely sound and strong/rigid, but if yours is falling apart, then you might need to make some temporary framing to help support it, and to make sure that it is not sagging or leaning to one side. If your wood frame has all but disappeared, then you may have to work largely from panel dimensions and build a wood frame from scratch. The steel brackets that reinforce the door hinge pillars, should help provide a reference for major dimensions of the body. The position of the front inner wings and alloy bulkhead might also provide a guide to where the plywood part of the bulkhead should be positioned.
Bodyshell
If you are going to do the full restoration and remove the bodyshell, then this is where it gets more worrying! The bodyshell was not designed to be removed, and was originally fitted in a number of sections which were then welded up in situ, leaving slight scorch marks on the wood. Even so, many of the edges of the panelling would have been hammered over the wood frame, such as the rear and side window surrounds.
To remove the bodyshell, you have to unfold some of the edges. The most difficult edges are arround the rear and side windows, since the curvature means the panelling creases. You need to unfold it just enough to be able to lift the bodyshell off. The rear half of the wheel arches needs the edges unfolded, and the same along the screen pillars. Other edges do not need unfolding as they don't obstruct lifting off the panelling.

Most of what I hear and read about working with aluminium alloy panels, suggests that it will crack to pieces if you even think about bending it! I know that some small areas on my car had dents knocked out years ago, and the little detachable wing panels had the edges unfolded and re-folded without annealing. I wouldn't recommend bending things so many times without annealing, but it has demonstrated that these panels can survive more work-hardening than expected, before cracks appear.
Preparing

The next stage is to make wooden alignment jigs (unless these were done at an earlier stage on a frame that was falling apart). These will support areas of the frame while you remove any major components. The jigs will need diagonal bracing to keep them rigid and prevent any part of the body frame from sagging, twisting, or shifting to one side.
As repairs progress, the shape of each part and assembly should be checked against doors, windows, wings and inside the main bodyshell as appropriate. If major parts have been removed and refitted/replaced, then also check that the frame does not lean to the left or right. Diagonal measurements across the width should be equal, but allowing for the fact that the two halves of such a car are not exact mirrors images - having been hand made.

<< Page 2 ****** Page 4 >>
